Tuesday 19 February 2013

Google+ Replaces Twitter As The World’s Second Biggest Social Network


Recently, Google+ has overtaken Twitter to be second in the social network rankings. This is based on active users, an active user counting as a user that posts something at least once a month. Google+ only stoops to Facebook, the number one social network, ruling supreme at the top. No surprises there, as Facebook claims half of the active internet users for their own. With their purchase of Instagram, Facebook seems to keep growing and growing, especially with their concept of the Graph Search.


Google+, the network which has been somewhat controversial, was after a long chain of failed social networking attempts from the search giant. This chain includes Orkut, Dodgeball, Jaiku, Google Wave and Google buzz. All of these early attempts flopped and Google+ seems to be Google’s only good shot at social media. Seeing that Google has overtaken Twitter in the social network standings for active users, it seems that Google+ has not been such a flop, and has actually done considerably well.


The reason Google+ was so successful compared to previous attempts at social networks, is probably due to its integration with Google’s search engine itself. Right on the front page of Google, members of the social network can see their alerts, and even click into them and see more posts in better detail. This means whenever one Google’s something, they will be reminded of their Google+ account and alerts. The likes of Twitter simply cannot reproduce this availability. Google+ is also integrated with YouTube, Google Maps and many other Google services that are used by many users every day.

Make sure you stay subscribed through our social media feeds, so that you never miss a beat, by liking us on Facebook, following us on Twitter and joining our circle on Google+.

Bharti Airtel to Introduce Wi-Fi Broadband Services


Bharti Airtel is rumored to introduce Wi-Fi broadband services in major cities including Delhi, Mumbai and Bangalore. Well with this major tied up outlets will get these Wi-Fi setup from Airtel and you can easily connect your unlimited devices and start downloading on the go. No downloading limitation, boosted up speeds and faster browsing so it will be fun connecting with your friends anytime anywhere.
PLANSPRICEDURATION
Wi-Fi20Rs.2030Min
Wi-Fi30Rs.3060Min
Wi-Fi50Rs.50120Min
So obviously these services will not be offered for free but these will session based service, so if you need to browse for 30min than you get that plan and your internet will automatically disconnect after that time.
Well there is still no exact date for this service to be released but you can get more information on Airtel W-Fi Services by calling toll free no. 18001022244

Adobe Released Photoshop CS6 Beta Download Now

The worlds best image editing and manipulation software Photoshop is now going to get even more better with its brand new CS6 version. CS6 version has brought some performance enhancements, some image editing tools are also updated for some superior fun.
Photoshop-CS6-Beta

Photoshop CS6 Highlights :

Content Aware Patch : Now you can patch images with great control and stability with new Content Aware Patch tool. Just sampling an area and than see the content aware magic.
Faster Performance Enhancements : Now CS6 comes equipped with a Mercury Graphics Engine which makes it more stable when using tools like liquify, puppet warp and other major ones.Re-Engineered Tools and Modern UI : Now CS6 tools and design has been re-engineered with some awesome improvements. Now creating marvelous designs with Photoshop CS6 is much fun.For more detailed information on Photoshop CS6 Highlights and other features you can check out their  official website.
Download Photoshop CS6 Beta Version for Windows and MAC :
You can Download Photoshop CS6 for both Mac and Windows for free from their official website. For Mac there is a DMG file 984MB and for Windows it’s a ZIP Package 1.7GB respectively. Hope you get the premium performance from this amazing new update form Adobe have fun and do share this post with all your friends.[ Image Credit : Stephen Shankland/CNET ]

How to Automatically Delete Spam Emails in your Gmail


Come on admit this thing that you receive more spam emails than the genuine one's on your daily basis, normally this has become a trade in online world that people get mails asking them to sign up fro some service fro receiving a bonus of $1,00,000000 whoops how many zero's have I added, well yes that what the case and all the people who are new to this online email world normally click on those spammy offers and struggle with their hacked account.
So these are nothing but spammers who are just trying to crack down your account to get your precious account credentials, so normally whatever emails you receive in your spam box are identifies as spams as Gmail's inbuilt filter thinks, so it is always recommended that you should no attempt to open any email you receive in you spam folder.
And it is recommended that you can should delete all those mails to play safe game in future, so now checking everyday that spam folder and deleting those mails is pretty complicated well what if we can make this process automatic and all those mails you receive in your spam folder gets deleted by its own, well obviously this thing has a drawback that if you sometimes receive some important email that will also get into the trash can but still for safe side this process should be attempted.
  1. no-spam-filterVisit Gmail –> Settings –> Filters –> Create New Filter.
  2. Now you will see a dialog asking you to identify what kind of mails should be filtered out before it gets delivered to your inbox.
  3. Well now just add in:spam in the "Has the Words" dialog, and press Create New Filer, now you might see a popup, just press OK.
  4. Now your New Filter is created just choose the options what you would like to do with those emails.
  5. Well you can do many things like forwarding those emails to some cyber expert fro analysis by adding his address or if you wanna delete it just tick the Delete It option and mark Also Apply this Filter.
  6. Now your filter is created and every email you receive in your Spam Folder will be deleted automatically.
So now there is not need to manually visit that Spam Folder and delete those ugly mails, you can anytime remove this filter by visiting your filters tab in Gmail settings :)

How to Block Porn Adult Websites without using Software


Online porn is just increasing day by day, people are enjoying these stuff but still many parent's are little worried about their children getting evolved in all these activities in really early age. Well I remember that when I started browsing there were no restrictions as my parents were not knowing much about this internet but now parents are little aware about these stuff and they continuously trying to add some restriction in their children's daily internet browsing schedule.
Well I think restricting is not a good way to stop your children from browsing these kind of stuff but you need to have much more Intel on how these things can be taken down and may be stopped at some point.
Well these are many software's available that claims to work and they do work like I listened about the Net Nanny and many others but today I will show a manual and free way to block all the porn sites on any particular computer. This involves in changing the DNS to Open DNS that automatically blocks all the bad websites.
  1. network-sharing-tab
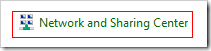
Open Control Panel and click on Network and Sharing Center.
  2. Now on this page just click on the connection you arewireless-network-connection
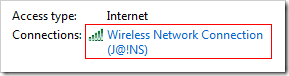
connected to and that will popup the dialog with many options.
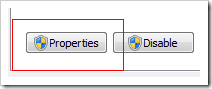
  3. Now just click on the Properties Tab and you will see some options double click onproperties-tabthe Internet Protocol version 4 and at the bottom choose Use the Following DNS Servers and add below DNS Server numbers to it.208.67.222.123
    208.67.220.123
  4. dns-server-optionNow when you will add above DNS Server number it will look something like right image, so now this is it just click on Apply and OK.
  5. Now your DNS Servers are changed and now just try to open any adult website, it will be automatically blocked. And you will see message like below.
blocked-porn-sites
So now it not a full proof protection for your children's or your friends, but still if they do not know much about these technical stuff except opening Google and searching than it will work seriously fine. So do share your thoughts through below comments on how you like this post and share it will your friends too.

Cheat: Get Full Power-Ups & Upgrades in Temple Run 2


temple-run-2-cheats
Well recently Imangi Studios released their Temple Run 2 successor of the earlier version and with no doubt it has become the best game ruling the entire season and rocking the app store. Well people are always in search for some free upgrades making their gaming experience much more faster and easier. As always people or being precise mobile zone hackers came up with another easy tweak to get unlimited power ups and upgrades for free in Temple Run 2.
Well with this tweak you can easily gain unlimited coins and gems making your powers ups much more easier and faster. Well you can easily get this tweak working on Android or iOS devices by following below tutorial.

Things you will need ?

  1. Gamedata.txt file. 
  2. Temple Run 2 game installed.
  3. A simple File Explorer (ES File Explorer)

For Android Devices

Now if you need to get unlimited money and gems in Temple Run 2 running on your Android device you have to little technical work, so follow steps mentioned below and make sure that you have played the game once to get this tweak working.
  1. Get everything mentioned on the right, every file should be on your computer.
  2. Now just transfer that "gamedata.txt" file to your Android device.
  3. Now fire up the File Explorer you have installed and navigate to/sdcard/Android/data/com.imangi.templerun2/files
  4. Now in this folder you will see "gamedata.txt" already present just rename that file to anything like "gamedata.apk" or anything according to your choice.
  5. Now you need to paste the downloaded "gamedata.txt" file right here, so copy it from where you have pasted and then paste it in this folder.
  6. That's it now your game is tweaked up with unlimited money and gems, so grab few power-ups and upgrades easily.

Things you will need ?

  1. Gamedata.txt file. 
  2. Temple Run 2 game installed.
  3. DiskAid tool for exploring iOS device & transferring stuff.

For iOS Devices

So now if you are on iOS devices and want to have this unlimited hack for your Temple Run 2 game, well you even need to do some technical work and this tweak will work. Well the same thing goes fro you too make sure that you have run the game once.
  1. Download everything mentioned on the right side.
  2. Now just open the "DiskAid" software on your computer and connect your iOS device to it, now just click on the Temple Run 2 game icon and paste the "gamedata.txt" file in their.
  3. That's it now your game is tweaked for unlimited coins, gems and money for getting those awesome power-ups.
  4. Well we even have a video that explains the whole procedure by demonstrating live, so check the below video on how its done and have fun.

Monday 18 February 2013

MidFinger, Dislike Hand & Rock Sign Facebook Chat Emoticons


facebook-emoticons

The Mid Finger
 – makes a bad impression but its still loved by many people so you can use that by typing [[midfing]] in your facebook chat box.I have posted many emoticons for Facebook chat like my recent one was for the valentines day, so you can use those emoticons to dedicate love but my earlier ones like animated emoticons are still loved by many people you can check them too. So I found three more emoticons that will surely get attention as they are the popular one's.

  1. The Dislike Hand – is another new emoticon that you can use by typing [[iidislyk]] in your facebook chat box, this will display a downward hand symbolizing bad signal.
  2. The Rock Sign – can be used if you really love what the other person said, so when you really feel something awesome has happened just raise your hand with this awesome sign just type down [[roxsign]] in your facebook chat box and this sign would appear.
So these were the three signs I want to use when ever you see respective things happening, well do check more posts related to facebook mentioned on the right and have fun :)

Watch Pokémon For Free On Your iPhone, iPod Touch, iPad Or Android Device With The Pokémon TV App


Here’s an awesome new app that will remind you of your childhood and keep your kids happy. Remember Pokémon, of course you do. Well,Pokémon Company International has launched a new Pokémon TV app for iOS devices, which lets you watch the popular Japanese cartoon for free.

Yup, that’s right. The Pokémon TV app for iPhone, iPod Touch and iPad will let you stream TV episodes to your iOS device for free. There’s absolutely no hidden charges, no need to open a new account or anything of that sort. Just download the app, browse through the rich library full of awesome Pokémon episodes and watch them.


You’re also able to watch special Pokémon movies, trailers, events and short films. And that’s not all. The app will receive new episodes and latest movies from time to time. This is a must have app for any Pokémon fan, as you can relive those childhood days when all you did was watch Pokémon, collected Pokémon cards and dreamed about them. Of course, since this is a free app, the quality of the video isn’t that great.


Pokémon the Movie is currently available to watch on the app as well. So go ahead anddownload this app from the App Store for free. It’s also available for Android devices. A very good move by the Pokémon Company International, don’t you think? Any die-hard Pokémon fans over here?

Download Pokémon TV for iPhone, iPod Touch and iPad [iTunes link]
Download Pokémon TV for Android [Play Store Link]

How to Quickly Change Windows Basic Settings Shortcut


mobility-center-settings
Windows comes with built in mobility center settings, that gives you option to change your brightness, sound settings, enable or disable Wi-Fi, check out spare display connection and much more according to the system you have windows on. Well now normally laptop's of this generation comes with built in button which you hit and access this mobility center settings, like mine Dell XPS 15R comes with a touch panel that give access to this settings quit easily, else on any other system you can access it through the control panel.
Well now if you want to access this mobility center settings faster then just follow below steps and you will have it opened easily when ever you need it.
  1. control-panel-mobility-centerOpen Control Panel.
  2. Now search for Windows Mobility Center.
  3. Now right click on it and click on Create Shortcut.
  4. Now this will automatically create a shortcut on your desktop, which when clicked will open this settings.
  5. So now you can copy to that shortcut to anywhere else if you want to so that you can access it much more easily.

Get Free 50Gb Box.net Online Storage for New Users Sign-Up


Box.net the biggest competitor of Dropbox is always coming up with many offers and promotions to attract more people who wants good and satisfied online storage. Well earlier they came up with a similar offer for providing 50Gb free storage to all theXperia Users but now that offer has been expired and new offer is introduced now they are providing free 50Gb storage to every new user who signs up for their account.
free-50-gb
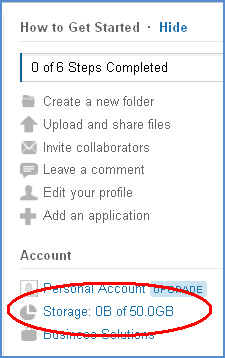
Well now obviously people would surely be attracted to this awesome offer and the major crowd would be from the blogger's community as they normally upload every kind of file on Box service that's what I have noticed so check below steps and grab your free storage.
  1. Visit Box.net 50Gb Offer Page
  2. Now on the right you will see normal fields, just fill them with genuine details.
  3. Now you will receive a confirmation email from them, make sure you verify your account.

HOW TO ROOT UR DROID


The Rooting Process

The term ‘Root’ refers to when users can directly gain access to the file system of the OS (try thinking it as gaining access to the system folders in Windows). There are a number of things a person can do once they have root access. This is what you will need to do to root your Android device:

1.Make sure you have the appropriate data cable, and have made a backup of your device.

2.Search for a Rooting Software on the Internet, examples include; Z4Root, Universal Androot, and SuperOneClick. Install them on your computer.

3.Some of these Rooting softwares may need the Android Software Developer Kit (SDK) (http://developer.android.com/sdk/index.html). It’s advisable to download this as well.

4.Before you jump in and try to root your device, make sure you make a complete backup. Most devices can be backed up with the software suites of the manufacturer of the phone. Examples include HTC Sync and Samsung KIES.

5.You will then need to enable USB Debugging mode on your Andriod device. To do this simply go to Settings > Applications > Development, and check the USB debugging option.

6.Now make sure your phone is connected to the computer, you are running the SDK application, and the rooting software. Just follow these steps along with the device-specific steps from one of the guides listed further on and you will have rooted your device.

Bump For iOS And Android Now


Bump, the popular file sharing service, has updated both its iOS and Android apps with a cool new ability. With the latest Bump app for iOS and Android, you can send files between your phone and your computer. It’s fast, easy, works great and looks super cool! Last year in December, Bump added the ability to send any files between two phones including photos, videos and other data. Now they’ve updated the web service which enables the receiving and sending of any files from and to your phone.


To send files from your iOS or Android device, all you have to do is go to http://bu.mp on your computers browser, open up the Bump app on your mobile device and hit the Spacebar with your phone. You’ll then get a notification to Connect to your computer, upon which your files will be automatically sent to your computer. Of course, you’ll have to select the files you want to send from the Bump app before you do tap the Spacebar.

You can also send files from your computer to your iOS or Android device. Just bump your phone to your computers Spacebar and you should see a ‘Send to device’ button on the top right corner of your screen. Simply select the files and they’ll be automatically sent to your mobile device. This means that you can literally use your mobile device as a flash drive and transfer files without any wires. Of course, there is a limit of 30MB when you’re transferring one or a bunch of files.

The new updated apps for both iOS and Android devices are available in their respective App Stores. And yes, you will need to get the latest update to make this new feature work flawlessly. Go get the new Bump app and try it out yourself. Make sure both your computer and mobile device are connected to the internet, preferably a fast one. It isn’t required that both are connected on the same network.